
Ensure compliance with local codes and proper installation location selection for optimal performance․ Follow detailed wiring diagrams and safety guidelines for a successful setup․ Includes troubleshooting tips․
Welcome to the Aprilaire 400 Humidifier Installation Manual․ This guide provides step-by-step instructions for installing, operating, and maintaining your humidifier․ Follow safely and efficiently․
Overview of the Aprilaire 400 Humidifier
The Aprilaire 400 is a high-efficiency, whole-house humidifier designed to maintain optimal indoor humidity levels․ It installs on either the supply or return plenum of a forced air system and is reversible for right or left-hand bypass duct connections․ The unit measures 15 x 14․375 x 10 inches, making it compact yet powerful․ Controlled by a manual humidistat, it ensures precise humidity levels․ The humidifier works in conjunction with the furnace blower, activating when humidity is needed․ Its durable design and easy serviceability make it a reliable choice for home humidity control․ Follow the manual for proper installation and maintenance to ensure optimal performance and longevity․

Pre-Installation Steps
Ensure proper location selection and compliance with local codes․ Gather all necessary tools and materials before starting․ Follow pre-installation checks for a smooth setup process․
Selecting the Installation Location
The Aprilaire 400 humidifier can be installed on either the supply or return plenum of a forced air handling system․ Ensure the location is easily accessible for maintenance and service․ Consider the dimensions of the unit, which measure 15 x 14․375 x 10 inches, to accommodate the space․ The humidifier must be installed in compliance with local, state, and federal codes․ It is also important to anticipate the unit’s reversible design, allowing for right or left-hand bypass duct connections; Proper placement ensures efficient operation and avoids potential issues with condensation or airflow․ Always refer to the manufacturer’s guidelines for optimal positioning․
Gathering Required Tools and Materials
To ensure a smooth installation, gather all necessary tools and materials beforehand․ Required tools include a drill, screwdrivers (Phillips and flathead), wrenches, pliers, and a utility knife․ Materials needed are ductwork components, screws, foil tape, and a transformer for 24VAC power․ Ensure you have the correct bypass duct dimensions and fittings for proper connections․ Additionally, obtain a humidity control kit if not already provided․ Check for any local code requirements that may necessitate additional materials․ Organize all components to avoid delays during installation․ Proper preparation ensures compliance with safety standards and manufacturer guidelines, leading to a successful setup․ Always verify the compatibility of materials with the Aprilaire 400 model to maintain performance and warranty validity․
Installation Steps
Mount the humidifier on the supply or return plenum, ensuring proper alignment․ Connect the bypass duct securely, then install the control unit․ Wire the system according to the diagram, ensuring all connections are tight and safe․ Refer to the manual for detailed instructions and safety precautions to complete the setup successfully․
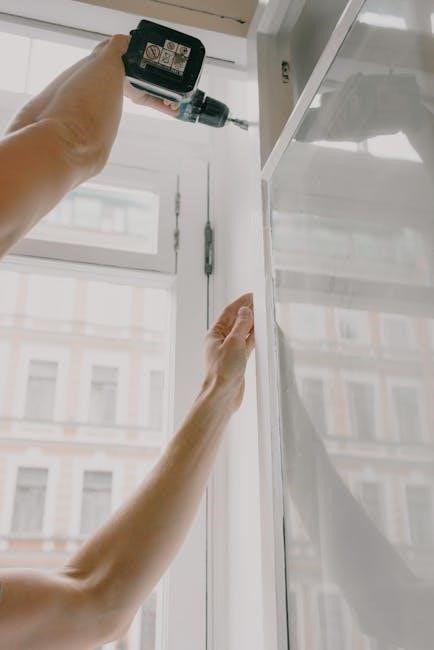
Mounting the Humidifier

The Aprilaire 400 humidifier can be mounted on either the supply or return plenum of your forced air handling system․ Ensure the unit is installed in a location that allows easy access for maintenance and service․ The humidifier is reversible, accommodating both right-hand and left-hand bypass duct connections․ Before mounting, verify the dimensions of the unit (15 x 14․375 x 10 inches) to ensure proper fit․ Use the provided mounting hardware to secure the humidifier firmly to the plenum․ A level surface is essential to prevent uneven installation, which could affect performance․ Follow the manufacturer’s instructions carefully to avoid any installation errors and ensure optimal humidity control in your home․ Proper mounting is crucial for efficient operation and longevity of the unit․ Always refer to the manual for specific mounting requirements and safety guidelines․
Connecting the Bypass Duct
Connect the bypass duct to the Aprilaire 400 humidifier, ensuring compatibility with your HVAC system․ The humidifier supports both supply and return plenum installations and is reversible for right or left-hand bypass connections․ Secure the bypass duct tightly to the humidifier’s outlet to ensure proper airflow and prevent leaks․ Use appropriate ducting materials and seals to maintain system efficiency․ Insulate the bypass duct if it passes through unheated spaces to prevent heat loss and condensation․ Ensure the duct is properly sized and aligned for optimal performance․ Refer to the manual for specific bypass duct installation requirements and diagrams․ Proper connection is critical for efficient humidification and system operation․ Always follow safety guidelines and manufacturer recommendations during installation to avoid potential issues․
Installing the Humidifier Control
Install the Manual Humidifier Control in the cold air return duct or on an interior wall for easy access․ Ensure the control is positioned at least 6 inches above the humidifier or bypass duct for accurate readings․ Follow the wiring diagram provided in the manual to connect the control to the humidifier and HVAC system․ Secure the control firmly to avoid vibration or movement; Set the humidistat according to the manufacturer’s instructions, adjusting based on outdoor temperature changes to prevent excessive condensation․ Test the control by running the HVAC system and verifying proper humidifier operation․ Proper installation ensures accurate humidity control and system efficiency․ Always refer to the manual for specific wiring and placement guidelines․
Wiring the Humidifier
Ensure the humidifier is wired according to the provided diagram and local electrical codes․ Connect the 24 VAC transformer to the control and humidifier․ Install the Manual Humidifier Control in the cold air return duct or on a wall, ensuring proper wiring connections to the HVAC system․ Refer to Step 7 in the manual for detailed wiring instructions․ Verify that all connections are secure and follow safety guidelines․ Test the system to ensure proper operation after wiring is complete․ Always consult the manual for specific wiring requirements and guidelines to avoid errors․ Proper wiring ensures accurate humidity control and system efficiency․ Follow all safety precautions to prevent electrical hazards․ Ensure compliance with local regulations during the wiring process;
Post-Installation Steps
Test the humidifier system to ensure proper operation․ Adjust the humidistat based on outdoor temperature changes to prevent condensation․ Perform routine maintenance as outlined in the manual․
Testing the Humidifier System
After installation, ensure the humidifier operates correctly․ Turn on the furnace and humidistat to test humidity levels․ Check for water flow and proper drainage․ Verify the bypass duct connection is secure and leak-free․ Ensure the humidistat accurately adjusts humidity based on outdoor temperatures․ Monitor the system for consistent operation and adjust settings as needed․ Check electrical connections and ensure the unit is level for proper function․ Inspect for any leaks or unusual noises․ Test the manual control to confirm it regulates humidity effectively․ Ensure the system integrates seamlessly with the furnace blower for optimal performance․ Review troubleshooting tips if issues arise during testing to ensure reliable operation․
Maintenance and Troubleshooting Tips
Regularly clean the evaporator pad and check the water panel for mineral buildup․ Inspect the humidistat for accurate humidity control and ensure proper drainage․ Check for leaks or unusual noises during operation․ Clean the orifice and ensure the unit is level for optimal performance․ If issues arise, refer to the troubleshooting guide for common problems like low humidity output or water overflow․ Adjust settings based on outdoor temperatures to prevent condensation․ Replace parts as needed, such as the water panel, to maintain efficiency․ Ensure the bypass duct is free of obstructions․ Verify electrical connections are secure and follow manufacturer recommendations for routine maintenance․ This ensures reliable operation and extends the lifespan of the humidifier․